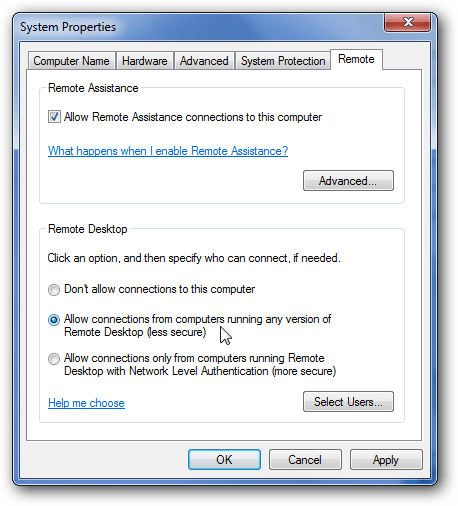
Here is how to turn on Remote Desktop in Windows 7, 8, 10, or VistaThe how-to segment
This should work for the Professional versions of Windows 10, 8, 8.1, 7, or Vista. Before starting, please note that this feature is available on all editions of mentioned Windows versions, except the home edition.
The how-to segment
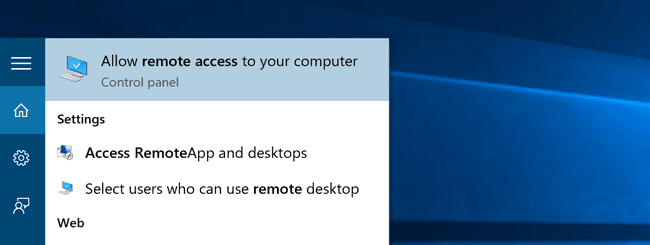
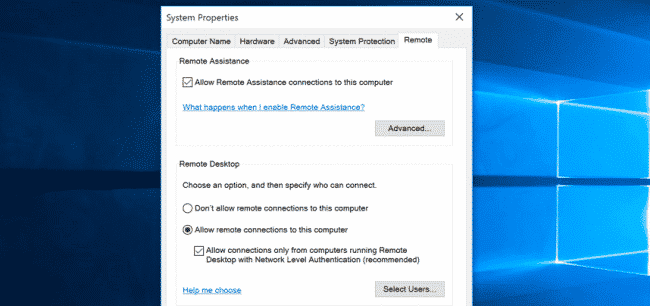
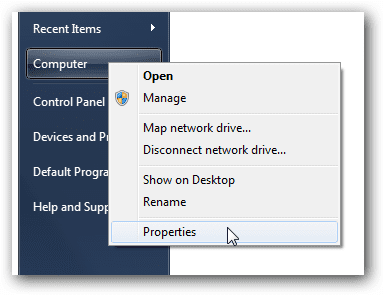
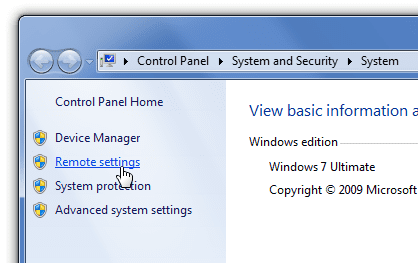
For Windows 8,8.1,10 If you are using Windows 8, 8.1, or 10 you will need to open the desktop Control Panel and find the System panel there. Or you can search for “Remote Access” in the Start Menu or Start Screen. Once you search, click on the “Allow remote access to your computer” item. It’ll look a little different in Windows 8, but it’s roughly the same thing. And now you can select “Allow remote connections to this computer” from the Remote tab. You can also choose which users can connect, or whether older versions of Windows can connect. For Windows 7 or Vista To get to the configuration page, you can either right-click the Computer icon and choose properties, or you can type in system into the start menu search box, and then find the entry for System. Now you’ll want to click the Remote Settings link on the left hand side. Again, if you are using Windows 8, this is the screen that you’ll want to find – or you can search for Remote settings. Now you can finally turn it on: Now, to connect from another Vista / Win7 PC on the same network, click the bottom radio button. If you need to connect from an XP/2k machine, click the “Allow connections from computers running any version of Remote Desktop” radio button. We recommend that you have a look at the following tools also. 1.Terminals 2.MultiDesk 3.RD Tabs
